Peel and Stick Wallpaper Installation Guide
Before starting installation process, please take a moment to read through this guide to ensure a successful installation of your chosen wallpaper. Understanding the process is key. If unsure of any steps, reach out to our customer service team for assistance and we will be more than happy to help you.
Tools needed to install peel and stick removable wallpaper
- Straight edge
- Paper knife
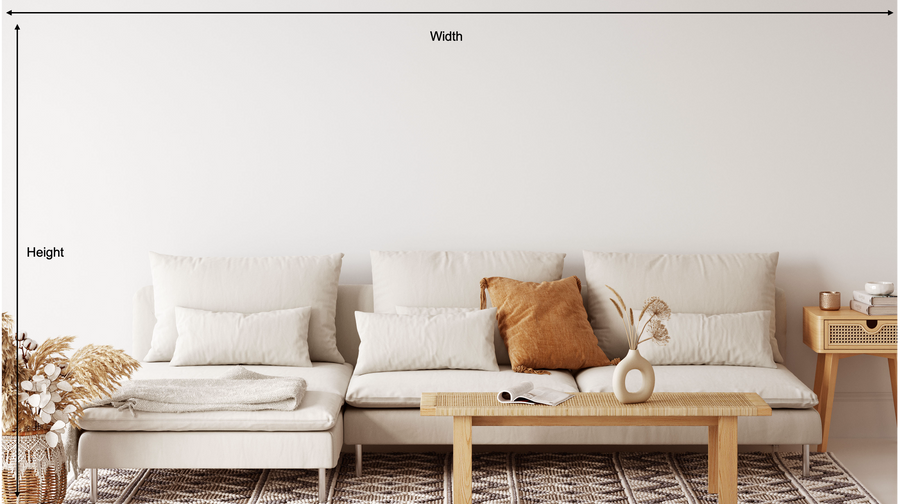
- Tape measure
- Microfibre cloth
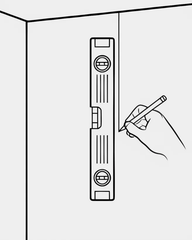
- Plumb line or level
- Pencil
- Plastic squeegee smoother (with felt edge) or a straight edge with a soft cloth wrapped around it for smoothing.
Wall conditions prior to application
- For the best adhesion, wall must be cleaned of all lint, oils, and other debris prior to application. Remove nails, screws and fill in any cracks. Switch off the electricity breakers and remove any socket, switch covers. Cleaned wall must be allowed to dry for 24 hours prior to application.
- To clean the wall: scrub with a general, all purpose cleaner, wash with isopropyl alcohol (70%), before a final scrub with a microfiber, lint-free cloth. Make sure any all-purpose cleaner is properly washed off of the wall and it is completely dry.
- Peel and Stick Wallpaper CAN NOT be installed over textured walls. Textured walls do not allow for proper bonding of the adhesive to the drywall. Please sand down the texture and re-paint the wall before proceeding for best results.
- Different paints require different cure times. Heavily pigmented paints take significantly longer time to cure. We recommend a minimum of 8 week cure time. Consult with your paint manufacturer for the proper primer and paint to use and their respective cure time.
*We recommend using paint finishes like Sateen or Gloss. - Uncured paints continue to off-gas solvent vapors as they cure. Even paints dry to the touch continue to off-gas as the paint cures. These solvent vapors can dissolve the adhesive used in the peel-and-stick product, resulting in product failure.
Tips for a successful installation:
- We recommend installing wallpapers with two people and a step ladder.
- Take your time, go slow, and remember that peel and stick wallpaper can be peeled, repositioned, and reapplied.
- Most mistakes can be resolved by peeling and reapplying correctly. Air bubbles can be smoothed out during installation.
- We cannot guarantee optimal product performance on textured or freshly painted walls.
- Product will have a 1" overlap in between each panel. Please disregard if item has butt ends (only if requested).
- Product will have a weak initial bond with a stronger bond over time.
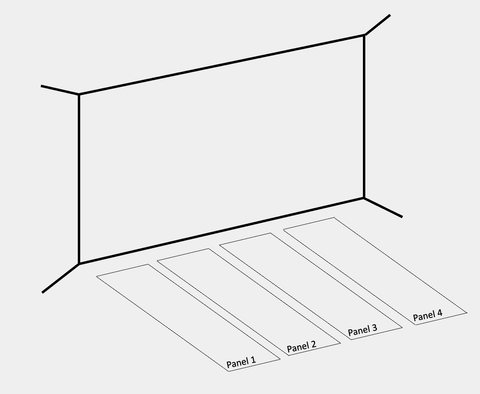
- Each panel of wallpaper is labeled at the bottom with a number. Begin with panel 1 on the left side of the wall and progress towards the right, following the numbered sequence.
*Labels will be trimmed off after hanging process is completed.
Step by Step Installation Process
1. Lay out all panels in front of the wall face up before applying
- Unroll the wallpaper and separate the rolls (panels). Arrange them in hanging order from left to right on the floor by using the numbers at the bottom left side of each panel. This number is always at the bottom of each drop so that you know the orientation of your mural, which is particularly useful for abstract designs! Please Note: If you have ordered multiple panels they will be rolled together.
- Before installing your mural, align the design to ensure it matches up correctly (remember the 1 inch vertical overlap between panels). If you find any issues with the print, please refrain from installing. Our customer service team is here to help with any concerns. We are unable to cover installation costs from external parties.
2. Align the first wallpaper panel
- Work from left to right as you face your wall. Use a tape measure and a level to mark a vertical straight line a panel’s width from the wall, this will give you a guide when hanging the first panel and ensure it’s hung straight. Ensuring that the first panel is hung straight is vital for successful installation of your mural.
Please note: Your wall may not be perfectly straight and using it as a reference will result in incorrect installation, take time to get this part right.
- With help from a partner, peel away approximately 20 inches of the backing paper from your first drop and position the top right edge along the marked plumb line.

- Once you’re happy the first drop is straight, use the felt tipped squeegee or similar to slowly apply pressure downwards and outwards starting from the middle. Be careful not to crease the wallpaper by smoothing too quickly or harshly. Smoothing the wallpaper outwards in diagonal directions allows you to remove any air trapped underneath the wallpaper.
- If the panel needs to be repositioned you can remove the panel multiple times and re-stick until straight.
Important: Removing the mural slowly and carefully will significantly reduce the possibility of damage or stretching.
3. Overlap the wallpaper panels

- When installing multiple panels hang them considering 1 inch overlap.
- Remove approximately third of the backing paper and with help from your partner, visually match the design down the length of the wall. When you’re happy that the panel is straight and matches, firmly press the panels together so that the seams are not visible. Again, smooth out any air bubbles with the squeegee or a soft cloth.
- Continue to remove the remaining backing paper and smoothing the mural carefully as you go until the wallpaper tile is fully installed.
4. Repeat the process until all wallpaper panels are installed
- Keep going by sticking up each panel or roll of your peel and stick wallpaper until the whole mural is up on the wall.
- Use a straight edge to help you cut straight, and a sharp blade to trim off any extra wallpaper material at the edges of your last piece and along the tops and bottoms of all the pieces.
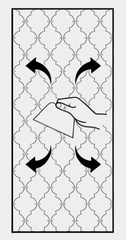
- Now for a really important step: smooth out the entire mural with a microfiber cloth. This helps get rid of any air bubbles and makes sure the wallpaper sticks well. Do this again a week after you first put up the mural. Let the wallpaper dry naturally in a room that’s well-aired. If there’s a radiator or any heat source on the same wall, turn it down or off for the first 24 hours to keep the paper from shrinking.
Finally, step back and enjoy your new wall! It’s quite the transformation, right?